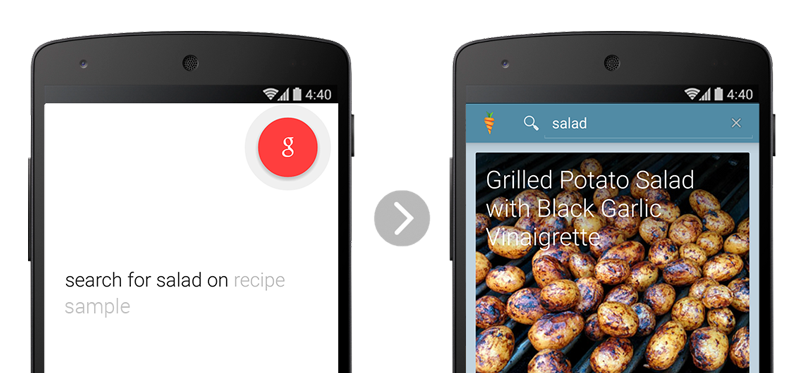
In this tutorial, you’ll learn how to handle voice searches in your Android app. If users have your app installed, they will be able to do a search from the Google app and deep link directly into the search results within your app.
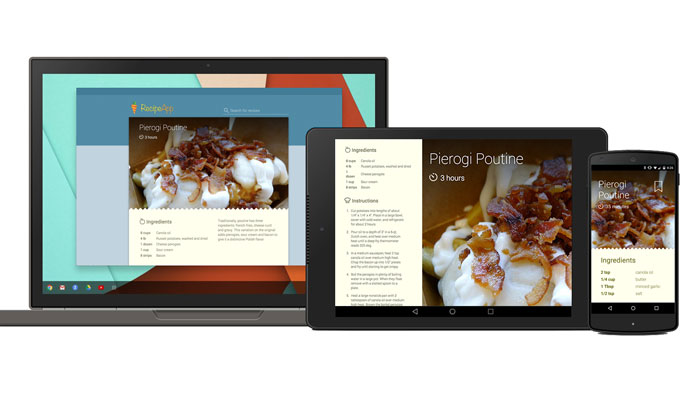
To help you get started we've built a sample Recipe App and a corresponding website.
What you’ll learn
- Adding search to your Android app.
- Triggering a search in your app from a voice search in the Google app.
What you’ll need
- You have watched the Voice search in your app DevByte video.
- The Google app version 2.8+
- A device with Android 4.1+
- An existing Android app that you can publish in the Play Store. (optional)
If you don't have an existing Android app to modify, you can follow along using our sample code. Even if you do have your own app, you'll probably find it helpful to have a working sample to build against.
...or clone the GitHub repository from the command line.
$ git clone https://github.com/google/search-samples.git
Now that you have the code downloaded, let's open the search-action Android sample app using Android Studio to see what our finished app will look like.
- Open Android Studio
- From the Quickstart section, click on Import Project...
- In the file chooser, select the search-action directory from the sample code that you downloaded.
- Click the
 Gradle sync button.
 - Plug your Android device into your computer and enable USB debugging.
- Click the
 Run button.
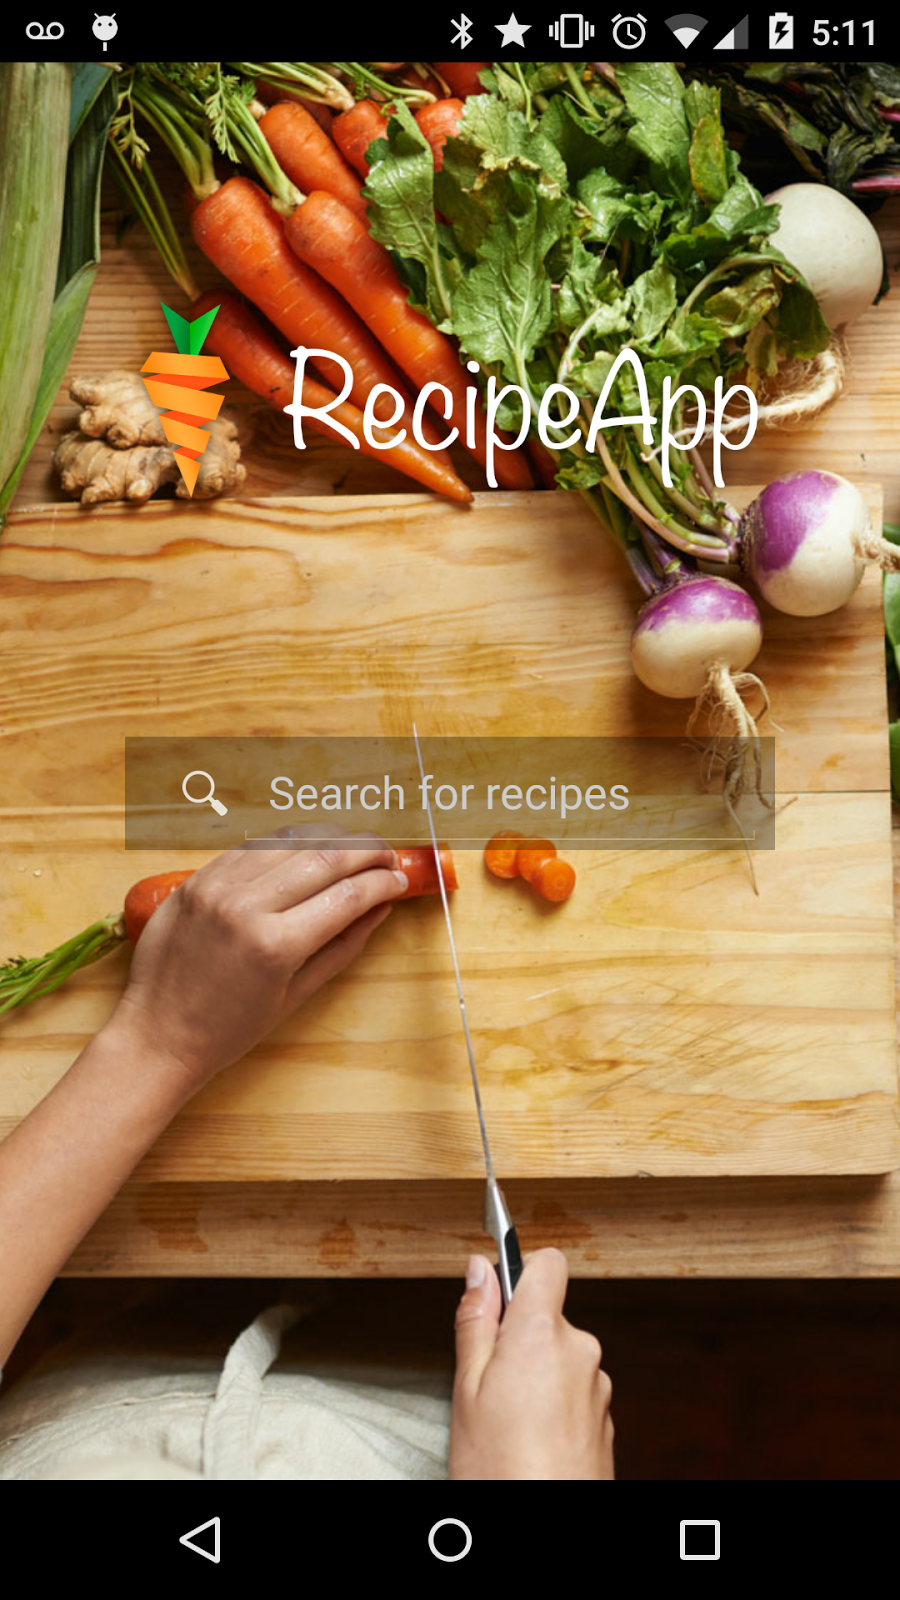
You should see the Recipe App home screen appear after a few seconds.
Open a command line terminal on your computer and type the following:
adb shell am start -a com.google.android.gms.actions.SEARCH_ACTION \
--es query "salad" com.recipe_app
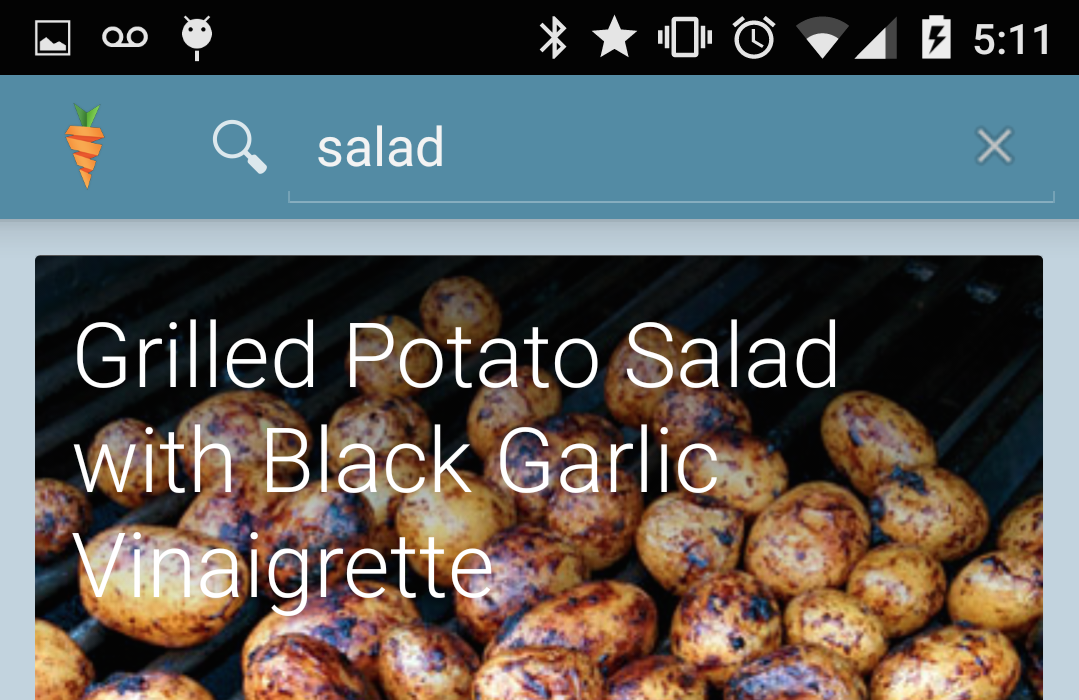
Verify that a page of search results appears. This is the result of a search action intent into the app.
Frequently Asked Questions
Let's learn how to add voice search to this app by building on top of the starter project.
- From the File menu in Android Studio, select Open
- In the file chooser, select the app-indexing directory from the sample code that you downloaded.
- Click the Gradle sync button.
- Click the Run button.
You should see the Recipe App home screen appear after a few seconds.
Open a command line terminal on your computer and type the following:
adb shell am start -a com.google.android.gms.actions.SEARCH_ACTION \
--es query "salad" com.recipe_app
Since this starter project doesn't yet handle the SEARCH_ACTION intent, you will see the following error:
Error: Activity not started, unable to resolve Intent {
act=com.google.android.gms.actions.SEARCH_ACTION flg=0x10000000 pkg=com.recipe_app (has extras) }
Now we're ready to start adding this capability to our starter app.
In order to provide quick search results in our app, we're going to query the local database via the RecipeContentProvider. To do this we’ll need to make the following changes:
Add a new constant to represent search queries in our content provider.
RecipeContentProvider.java
private static final int RECIPE_SEARCH = 50;
Register that constant with the UriMatcher for all URIs starting with "/search/".
RecipeContentProvider.java
private static final UriMatcher sURIMatcher = new UriMatcher(UriMatcher.NO_MATCH);

...

static {
    sURIMatcher.addURI(AUTHORITY, BASE_PATH, RECIPES);
    sURIMatcher.addURI(AUTHORITY, BASE_PATH + "/search/*", RECIPE_SEARCH);
    sURIMatcher.addURI(AUTHORITY, BASE_PATH + "/ingredients/*", RECIPE_INGREDIENTS);
    sURIMatcher.addURI(AUTHORITY, BASE_PATH + "/instructions/*", RECIPE_INSTRUCTIONS);
    sURIMatcher.addURI(AUTHORITY, BASE_PATH + "/*", RECIPE_ID);
}
Add some code to handle the new RECIPE_SEARCH URIs in the query() method.
RecipeContentProvider.java
@Override
public Cursor query(Uri uri, String[] projection, String selection,
                    String[] selectionArgs, String sortOrder) {

    int uriType = sURIMatcher.match(uri);
    if (uriType == RECIPES) {
    } else if (uriType == RECIPE_ID) {
        return getRecipe(uri);
    } else if (uriType == RECIPE_INGREDIENTS) {
        return getIngredientsByRecipe(uri);
    } else if (uriType == RECIPE_INSTRUCTIONS) {
        return getInstructionsByRecipe(uri);
    } else if (uriType == RECIPE_SEARCH) {
        String query = Uri.decode(uri.getLastPathSegment());
        return findRecipes(query);
    } else {
        throw new IllegalArgumentException("Unknown URI: " + uri);
    }
    return null;
}
Now it's time to actually implement the recipe search query to our database. This is a pretty simple query, we're simply looking for the search query in the title of any of the recipes in our database.
RecipeContentProvider.java
private Cursor findRecipes(String query) {
    SQLiteQueryBuilder queryBuilder = new SQLiteQueryBuilder();
    queryBuilder.setTables(RecipeTable.TABLE);
    String[] projection = { RecipeTable.ID, RecipeTable.TITLE,
            RecipeTable.DESCRIPTION, RecipeTable.PHOTO,
            RecipeTable.PREP_TIME};
    SQLiteDatabase db = database.getReadableDatabase();
    queryBuilder.appendWhere(RecipeTable.TITLE + " like '%"
            + query + "%'");
    return queryBuilder.query(db, projection, null,
            null, null, null, null);
}
This basic search functionality will allow us to obtain a list of search results in our application. As you can imagine, there's a lot more we could do to improve this search like matching keywords individually and looking at the ingredients list.
Frequently Asked Questions
Now it's time to start building a UI to display our search results as a grid of cards. In order to display the results as a grid of cards, we need to add a couple support libraries to our project:
- com.android.support:cardview-v7
- com.android.support:recyclerview-v7
build.gradle
dependencies {
    compile 'com.android.support:support-v13:21.0.0'
    compile 'com.google.android.gms:play-services-appindexing:7.0.0'
    compile group:'com.squareup.picasso', name:'picasso', version:'2.3.2'
    compile 'com.android.support:cardview-v7:21.0.+'
    compile 'com.android.support:recyclerview-v7:21.0.+'
    compile 'com.readystatesoftware.sqliteasset:sqliteassethelper:+'
}
The layout for our view is pretty straightforward. It's just a RecyclerView. All the fancy card layout comes later.
layout/activity_search.xml
<?xml version="1.0" encoding="utf-8"?>

<LinearLayout xmlns:android="http://schemas.android.com/apk/res/android"
    android:orientation="vertical"
    android:layout_width="match_parent"
    android:layout_height="match_parent"
    android:background="#ffc1d3df">

    <android.support.v7.widget.RecyclerView
        android:id="@+id/my_recycler_view"
        android:scrollbars="vertical"
        android:layout_width="match_parent"
        android:layout_height="match_parent"
        android:padding="6dp" />

</LinearLayout>
Now let's create that class to load the cards into our view.
SearchResultAdapter.java
class ViewHolder extends RecyclerView.ViewHolder {
        // each data item is just a string in this case
        public View mTextView;
        public ViewHolder(View v) {
            super(v);
            mTextView = v;
        }
    }

    // Provide a suitable constructor (depends on the kind of dataset)
    public SearchResultAdapter() {
    }

    // Create new views (invoked by the layout manager)
    @Override
    public SearchResultAdapter.ViewHolder onCreateViewHolder(ViewGroup parent,
                                                             int viewType) {
        // create a new view
        View v = LayoutInflater.from(parent.getContext())
                .inflate(R.layout.search_result_card, parent, false);

        ViewHolder vh = new ViewHolder(v);
        return vh;
    }

    // Replace the contents of a view (invoked by the layout manager)
    @Override
    public void onBindViewHolder(ViewHolder holder, int position) {
        final Recipe recipe = mDataset.get(position);

        TextView cardTitle = (TextView)holder.mTextView.findViewById(R.id.info_text);
        cardTitle.setText(recipe.getTitle());

        ImageView cardThumb = (ImageView)holder.mTextView.findViewById(R.id.seach_result_thumbnail);
        Picasso.with(holder.itemView.getContext())
                .load(recipe.getPhoto())
                .fit().centerCrop()
                .into(cardThumb);

        holder.mTextView.setOnClickListener(new View.OnClickListener() {
            @Override
            public void onClick(View view) {
                Intent intent = recipe.getViewIntent(view.getContext());
                view.getContext().startActivity(intent);
            }
        });
    }

    // Return the size of your dataset (invoked by the layout manager)
    @Override
    public int getItemCount() {
        return mDataset.size();
    }

    public void addResult(Recipe recipe) {
        mDataset.add(recipe);
    }

    public void clearResults() {
        mDataset.clear();
    }
}
Add the relevant imports.
SearchResultAdapter.java
import android.content.Intent;
import android.support.v7.widget.RecyclerView;
import android.view.LayoutInflater;
import android.view.View;
import android.view.ViewGroup;
import android.widget.ImageView;
import android.widget.TextView;
import com.recipe_app.R;
import com.squareup.picasso.Picasso;
import java.util.ArrayList;
import java.util.List;
You can see that this class uses the ViewHolder pattern to instantiate new views for each of our search results.
The layout of each card is defined in search_result_card.xml which is where we specify the CardView and the components inside of it.
layout/search_result_card.xml
<?xml version="1.0" encoding="utf-8"?>

<LinearLayout xmlns:android="http://schemas.android.com/apk/res/android"
    android:orientation="vertical" android:layout_width="match_parent"
    android:layout_height="match_parent"
    android:padding="6dp">

    <android.support.v7.widget.CardView
        xmlns:card_view="http://schemas.android.com/apk/res-auto"
        android:id="@+id/card_view"
        android:layout_gravity="center"
        android:layout_width="fill_parent"
        android:layout_height="300dp"
        card_view:cardCornerRadius="2dp">

        <ImageView
            android:id="@+id/seach_result_thumbnail"
            android:layout_width="fill_parent"
            android:layout_height="fill_parent" />

        <LinearLayout
            android:orientation="vertical"
            android:layout_width="fill_parent"
            android:layout_height="wrap_content"
            android:weightSum="1"
            android:background="@drawable/main_header_selector"
            android:clickable="true">

            <TextView
                android:id="@+id/info_text"
                android:layout_width="match_parent"
                android:layout_height="match_parent"
                style="@style/SearchResult.Title"
                android:padding="12dp"/>

        </LinearLayout>

    </android.support.v7.widget.CardView>

</LinearLayout>
We'll need to add a new style for the text that overlays the images.
values/styles.xml
<style name="SearchResult.Title"
    parent="@android:style/TextAppearance.Large.Inverse">
    <item name="android:fontFamily">sans-serif-light</item>
    <item name="android:textSize">30sp</item>
    <item name="android:layout_height">wrap_content</item>
    <item name="android:textColor">#FFFFFF</item>
</style>
In the next step, we will need an Integer resource called search_results_columns to tell us how many columns to show:
values/integers.xml
<integer name="search_results_columns">1</integer>
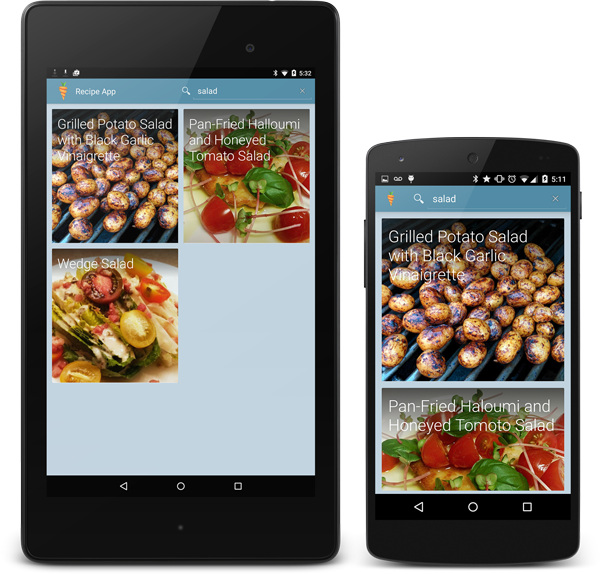
We can then overload this value for other layouts so tablets and devices in landscape mode can show more columns of search results:
values-land/integers.xml
<integer name="search_results_columns">2</integer>
values-large/integers.xml
<integer name="search_results_columns">2</integer>
values-large-land/integers.xml
<integer name="search_results_columns">3</integer>
Now we have a flexible layout that can show a variable number of columns of search results depending on the size and orientation of the device.
Frequently Asked Questions
Now let's create a new Activity called SearchActivity in the com.recipe_app.client package. This will be where we handle search queries and display the results in the view that we defined in the previous step.
SearchActivity.java
public class SearchActivity extends Activity implements SearchView.OnQueryTextListener {
    ...
}
We'll need to declare these components as members of our Activity so that we can access them in our code.
SearchActivity.java
private static String GMS_SEARCH_ACTION = "com.google.android.gms.actions.SEARCH_ACTION";
private RecyclerView mRecyclerView;
private SearchResultAdapter mAdapter;
private RecyclerView.LayoutManager mLayoutManager;
private SearchView mSearchView;
private String mQuery;
Add the relevant imports.
SearchActivity.java
import android.app.Activity;
import android.app.SearchManager;
import android.app.SearchableInfo;
import android.content.Context;
import android.content.Intent;
import android.database.Cursor;
import android.net.Uri;
import android.os.Bundle;
import android.support.v7.widget.GridLayoutManager;
import android.support.v7.widget.RecyclerView;
import android.view.Menu;
import android.view.MenuInflater;
import android.view.MenuItem;
import android.view.Window;
import android.widget.SearchView;
import com.recipe_app.R;
import com.recipe_app.client.content_provider.RecipeContentProvider;
import com.recipe_app.client.database.RecipeTable;
import java.util.List;
Then we'll initialize the components in our onCreate() method and add some required handler methods for SearchView.OnQueryTextListener.
SearchActivity.java
@Override
protected void onCreate(Bundle savedInstanceState) {
    super.onCreate(savedInstanceState);
    getWindow().requestFeature(Window.FEATURE_ACTION_BAR);
    setContentView(R.layout.activity_search);

    mRecyclerView = (RecyclerView) findViewById(R.id.my_recycler_view);

    // use this setting to improve performance if you know that changes
    // in content do not change the layout size of the RecyclerView
    mRecyclerView.setHasFixedSize(true);

    // use a grid layout manager
    int numColumns = getResources().getInteger(R.integer.search_results_columns);
    mLayoutManager = new GridLayoutManager(this, numColumns);
    mRecyclerView.setLayoutManager(mLayoutManager);

    // specify an adapter (see also next example)
    mAdapter = new SearchResultAdapter();
    mRecyclerView.setAdapter(mAdapter);

    onNewIntent(getIntent());
}

@Override
public boolean onQueryTextChange(String newText) {
    return false;
}

@Override
public boolean onQueryTextSubmit(String query) {
    return false;
}
And of course we need a search method to carry out the search queries.
SearchActivity.java
private void doSearch(String query) {
    Uri searchUri = RecipeContentProvider.CONTENT_URI.buildUpon()
            .appendPath("search").appendEncodedPath(query).build();

    String[] projection = { RecipeTable.ID, RecipeTable.TITLE,
            RecipeTable.DESCRIPTION, RecipeTable.PHOTO,
            RecipeTable.PREP_TIME};
    Cursor cursor = getContentResolver().query(searchUri, projection, null, null, null);
    cursor.moveToFirst();
    mAdapter.clearResults();
    while (!cursor.isAfterLast()) {
        final Recipe recipe = Recipe.fromCursor(cursor);
        mAdapter.addResult(recipe);
        cursor.moveToNext();
    }
}
Here you can see that we call our content provider via the ContentResolver to get the search results. We then construct Recipe objects from those results and add them to the RecyclerView. This is the main search method that we'll call every time we want to carry out a new search.
Frequently Asked Questions
Now it's time to add the relevant code to our Android app so that it can accept search intents from Google Search.
We'll start by declaring our SearchActivity in our Android Manifest and add the appropriate intent filters.
AndroidManifest.xml
<activity android:name=".client.SearchActivity"
    android:label="@string/app_name"
    android:exported="true"
    android:launchMode="singleTop">
    <intent-filter>
        <action android:name="android.intent.action.SEARCH" />
        <category android:name="android.intent.category.DEFAULT" />
        <category android:name="android.intent.category.BROWSABLE" />
    </intent-filter>
    <intent-filter>
        <action android:name="com.google.android.gms.actions.SEARCH_ACTION" />
        <category android:name="android.intent.category.DEFAULT" />
        <category android:name="android.intent.category.BROWSABLE" />
    </intent-filter>
    <meta-data android:name="android.app.searchable"
        android:resource="@xml/searchable" />
</activity>
The android.app.searchable metadata is used to point to an XML file which allows us to customize the search view.
xml/searchable.xml
<?xml version="1.0" encoding="utf-8"?>

<searchable xmlns:android="http://schemas.android.com/apk/res/android"
    android:label="@string/app_name"
    android:hint="@string/search_hint" >
</searchable>
We also need to create a String resource for the hint that gets shown in our various search boxes.
values/strings.xml
<string name="search_hint">Search for recipes</string>
With our intent declared for our Activity, we now need to add the code to handle the intent in our app.
SearchActivity.java
protected void onNewIntent(Intent intent) {
    String action = intent.getAction();
    if (action.equals(Intent.ACTION_SEARCH) ||
        action.equals(GMS_SEARCH_ACTION)) {
        mQuery = intent.getStringExtra(SearchManager.QUERY);
        doSearch(mQuery);
    }
}
Now, every time our SearchActivity receives a com.google.android.gms.actions.SEARCH_ACTION intent we'll call our doSearch() method to retrieve a list of matches from our ContentProvider.
Frequently Asked Questions
Now let's make sure that the search intents are making it all the way to the correct view in our Android app.
- Make sure that your Android device has the Recipe App installed
- Open a command prompt and type:
adb shell am start -a com.google.android.gms.actions.SEARCH_ACTION \
--es query "salad" com.recipe_app
- Verify that the Recipe App opens and the correct recipe is shown.
Frequently Asked Questions
Now that we've got the basic search functionality in place, let's build search into the other activities of our app. We'll start by creating a searchview that can be shown the SearchActivity action bar.
menu/searchview_in_menu.xml
<?xml version="1.0" encoding="utf-8"?>
<menu xmlns:android="http://schemas.android.com/apk/res/android">
    <item android:id="@+id/action_search"
        android:title="Search"
        android:icon="@android:drawable/ic_menu_search"
        android:showAsAction="always"
        android:actionViewClass="android.widget.SearchView" />
</menu>
Once the layout is defined, we can add the corresponding code to the SearchActivity.
SearchActivity.java
@Override
public boolean onCreateOptionsMenu(Menu menu) {
    super.onCreateOptionsMenu(menu);

    MenuInflater inflater = getMenuInflater();
    inflater.inflate(R.menu.searchview_in_menu, menu);
    MenuItem searchItem = menu.findItem(R.id.action_search);
    mSearchView = (SearchView) searchItem.getActionView();
    setupSearchView(searchItem);

    if (mQuery != null) {
        mSearchView.setQuery(mQuery, false);
    }

    return true;
}

...

private void setupSearchView(MenuItem searchItem) {

    mSearchView.setIconifiedByDefault(false);

    SearchManager searchManager = (SearchManager) getSystemService(Context.SEARCH_SERVICE);
    if (searchManager != null) {
        List<SearchableInfo> searchables = searchManager.getSearchablesInGlobalSearch();

        SearchableInfo info = searchManager.getSearchableInfo(getComponentName());
        for (SearchableInfo inf : searchables) {
            if (inf.getSuggestAuthority() != null
                    && inf.getSuggestAuthority().startsWith("applications")) {
                info = inf;
            }
        }
        mSearchView.setSearchableInfo(info);
    }

    mSearchView.setOnQueryTextListener(this);
    mSearchView.setFocusable(false);
    mSearchView.setFocusableInTouchMode(false);
}
Now we have a working SearchView that accepts queries and triggers a new search in our SearchActivity. Let's test it out:
-
Run the app.
- You should see the Recipe App home screen appear after a few seconds.
- Open a command prompt and type:
adb shell am start -a com.google.android.gms.actions.SEARCH_ACTION \
--es query "salad" com.recipe_app
- This should take you to the search result view as it did before.
- Find the search view at the top of the search results page and enter in a new query like "paella".
- Verify that it carries out the search properly.
Frequently Asked Questions
We can also easily add other SearchViews to other parts of our app; like the home activity. Let's do that now.
layout/activity_home.xml
<SearchView android:layout_width="fill_parent"
    android:layout_height="wrap_content"
    android:layout_marginTop="70dp"
    android:iconifiedByDefault="false"
    android:background="#4a000000"
    android:queryHint="Search for recipes"
    android:id="@+id/homeSearch"
    android:theme="@style/CustomSearchView"
    android:focusable="false"
    android:focusableInTouchMode="false" />
We'll also create a CustomSearchView style so that the hint text is light grey and matches the styles of our homepage.
values/styles.xml
<style name="CustomSearchView"
    parent="@android:style/Widget.Holo">
    <item name="android:textColorHint">#CCCCCC</item>
</style>
Once the SearchView is in place, all we need to do is set up a OnQueryTextListener to handle the queries.
HomeActivity.java
@Override
protected void onCreate(Bundle savedInstanceState) {
    super.onCreate(savedInstanceState);
    setContentView(R.layout.activity_home);

    final SearchView searchView = (SearchView)findViewById(R.id.homeSearch);
    searchView.setOnQueryTextListener(new SearchView.OnQueryTextListener() {
        @Override
        public boolean onQueryTextSubmit(String query) {
            Intent intent = new Intent(searchView.getContext(), SearchActivity.class);
            intent.setAction(Intent.ACTION_SEARCH);
            intent.putExtra(SearchManager.QUERY, query);
            startActivity(intent);
            return false;
        }

        @Override
        public boolean onQueryTextChange(String s) {
            return false;
        }
    });
}
Lastly, we should make our HomeActivity searchable from the AndroidManifest by adding the following code inside the HomeActivity <activity> declaration.
AndroidManifest.xml
<meta-data android:name="android.app.default_searchable"
    android:value=".client.SearchActivity" />
Now we've successfully added a SearchView to the HomeActivity of our app that can handle searches by sending them to the SearchActivity. Let's test it out:
-
Run the app.
- You should see the Recipe App home screen appear after a few seconds.
- Notice the search view in the middle of the screen and enter in a query like "salad".
- Verify that it carries out the search properly.
Congratulations, your app is now ready to carry out voice searches from the Google app.
What we've covered:
- Implementing local database search with a ContentProvider.
- Displaying search results as a grid of cards.
- Adding search inputs to the action bar.
- Handling voice search intents from the Google app.
Next Steps:
- Add voice search to your own app
If you would like to find out more about Voice Search please see the full developer documentation.
You can post questions and find answers on Stackoverflow under the google-voice-actions, android-search or searchview tags.