With the release of Google Play services 7.8, you can now use new Mobile Vision APIs which provide new Face Detection APIs that find human faces in image and video better and faster than before, and which offer smart services such as understanding faces at different orientations, detecting facial features, and understanding facial expressions.
Face Detection
Face Detection is a leap forward from the previous Android FaceDetector.Face API. It’s designed to better detect human faces in images and video for easier editing. It’s smart enough to detect faces even at different orientations -- so if your subject’s head is turned sideways, it can detect it. Specific landmarks can also be detected on faces, such as the eyes, the nose, and the edges of the lips.
Prerequisites
Before beginning, check that you have all the necessary pre-requisites. These include:
- Android Studio
- An Android Device that runs Android 4.2.2 or later -or- A configured Android Emulator (this is available in Android Studio)
- The latest version of the Android SDK including the SDK tools component. You can get this from the Android SDK Manager in Android Studio.
- The Google Play Services SDK. You can get this from the Android SDK Manager in Android Studio.
In this step you’ll create the basic skeleton of an app that you’ll fill in later by adding the sign in code.
Create the new App
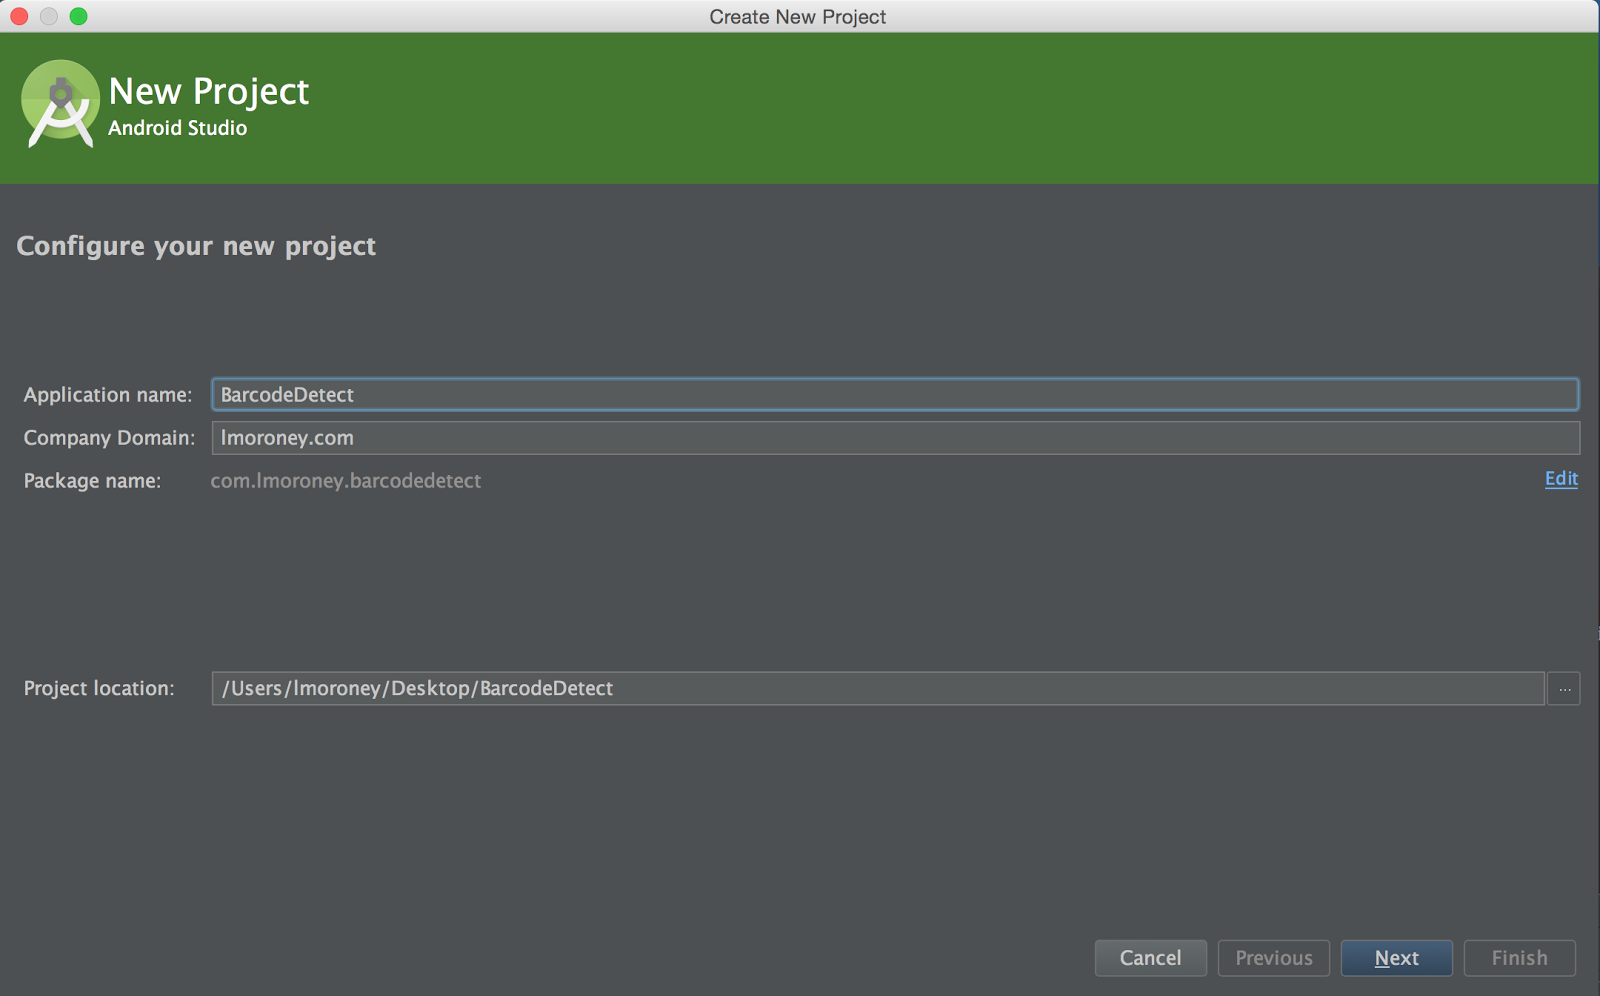
Open Android Studio. When you launch Android Studio, you’ll see an option to ‘Start a new Android Studio project’. Select this. You’ll see the ‘New Project’ dialog. Enter the details for your app.
Press Next, and you’ll get a screen asking to ‘Target Android Devices’. Accept the default here, and press Next to the next screen.
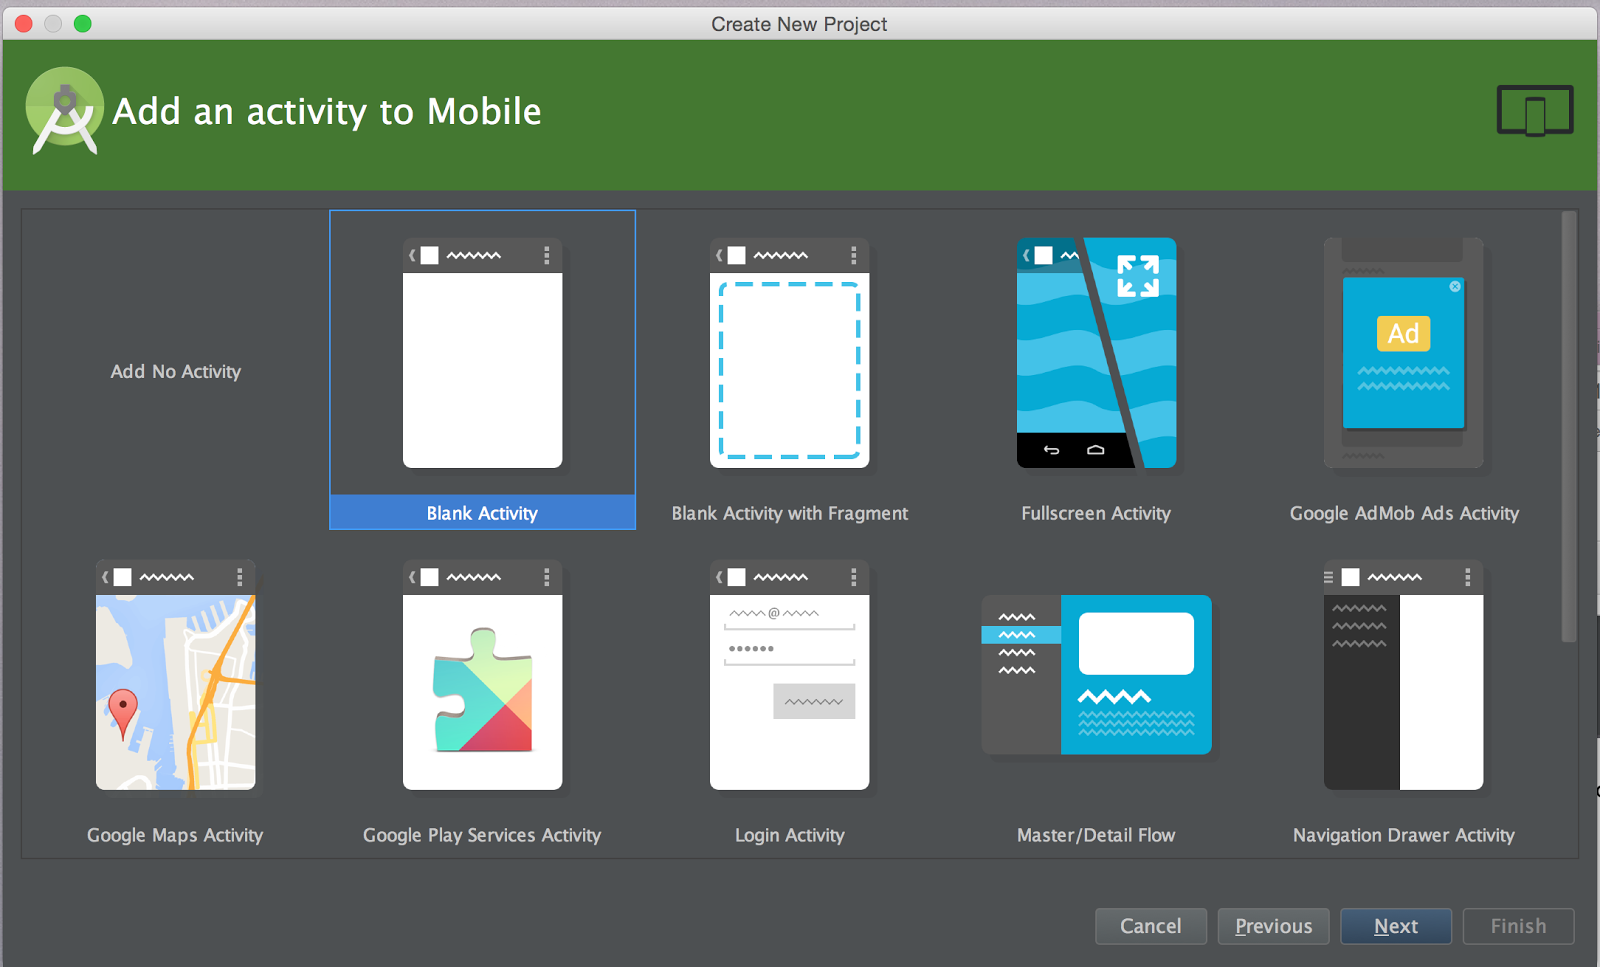
You’ll see ‘Add an activity to Mobile’ dialog. Ensure that you select ‘Blank Activity’ here.
Click ‘Next’ and you’ll be asked to customize the Activity. Just accept the defaults, and press ‘Finish’.
Configure Build.gradle
In this step you’ll ensure that your app can use Google Play services, in which the Mobile Vision APIs reside. To do this, you’ll first update your build.gradle file.
In Android Studio, open the Gradle Scripts node, and select build.gradle (Module App) as shown:

This will open your build.gradle file, at the bottom of which will be code like this:
dependencies {
    compile fileTree(dir: 'libs', include: ['*.jar'])
}
Add a dependency for play services like this:
dependencies {
compile fileTree(dir: 'libs', include: ['*.jar'])
compile 'com.android.support:appcompat-v7:22.0.0'
compile 'com.google.android.gms:play-services:7.8+'
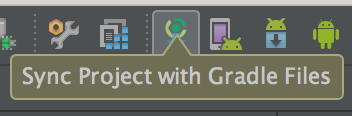
}If you are asked to perform a gradle sync, do so. Otherwise, find the Gradle Sync button on the toolbar and press it to trigger a sync. It looks like this:
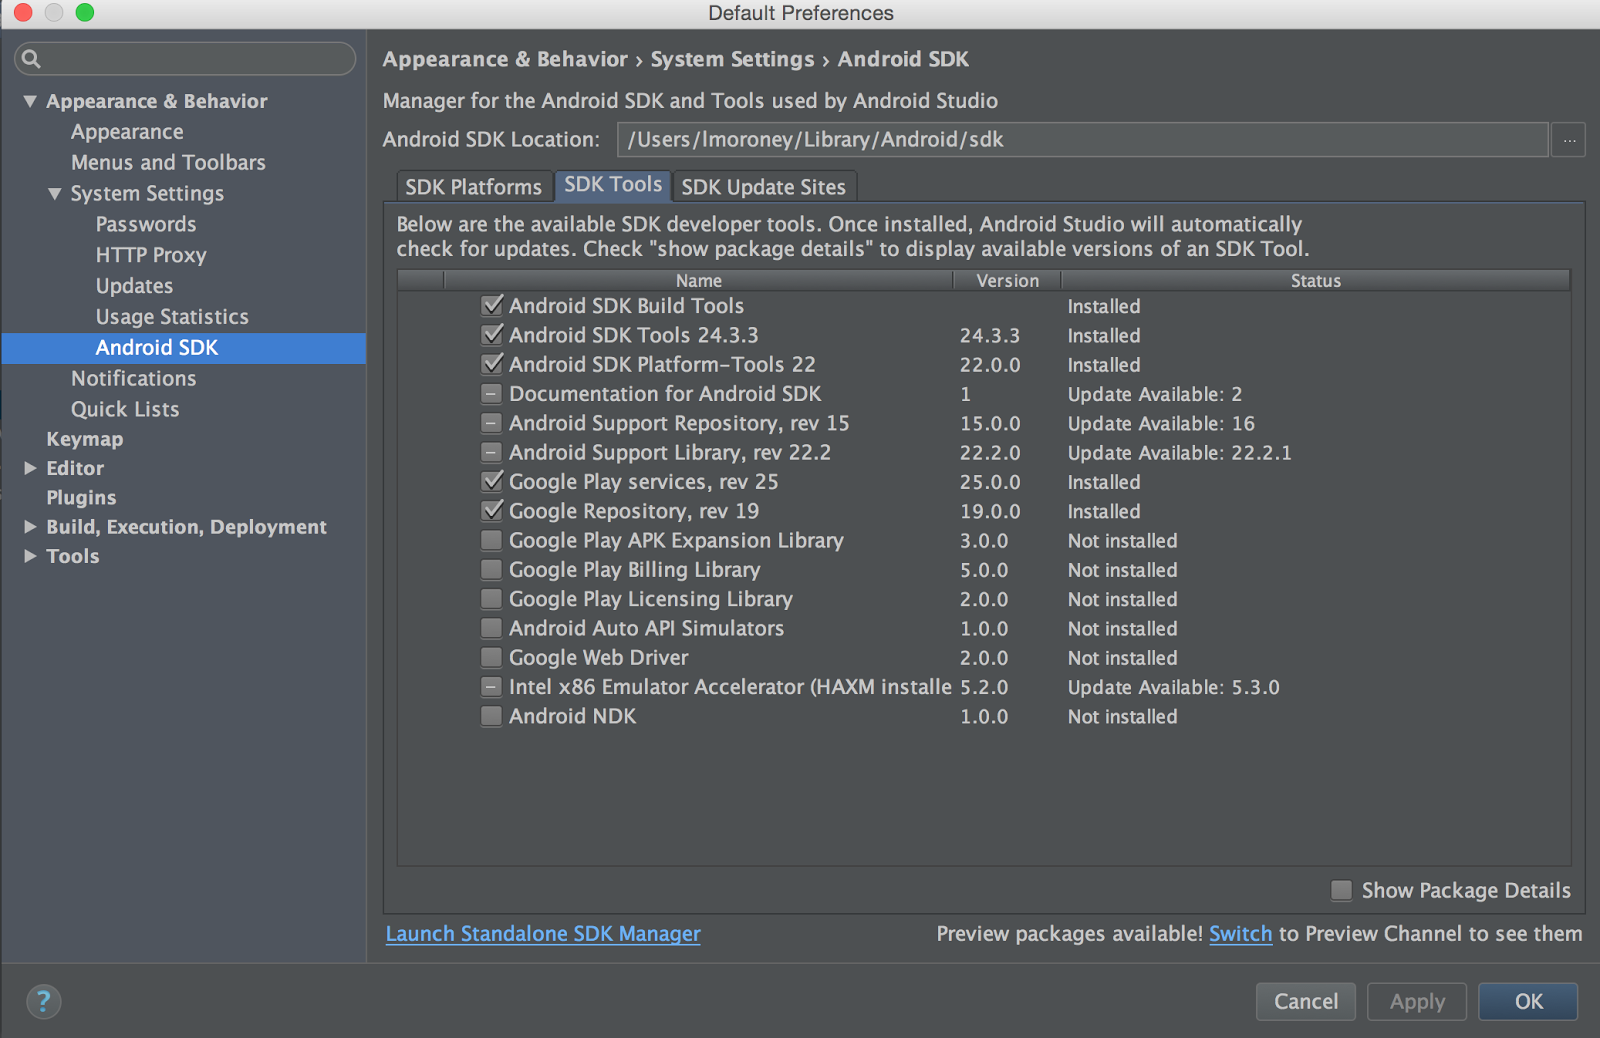
Update Google Play Services
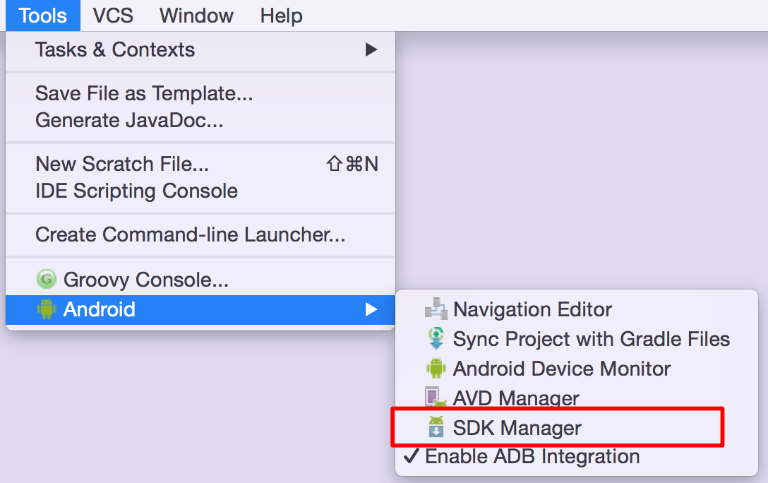
Google Play services is frequently updated and this codelab assumes you have a recent version. To get the latest version, in Android Studio click Tools > Android > SDK Manager:
Then find the entry for Google Play Services and make sure you have version 26 or higher:
Build a Basic UI
Now that your app is fully configured, it’s time to build a UI that lets the user detect a face in an image, and then overlay that face with a bounding box.
In Android Studio, select the ‘res’ folder, and open it’s ‘layout’ subfolder. In here you’ll see ‘activity_main.xml’.
Double click to open it in the editor, and be sure to select the ‘Text’ tab at the bottom of the editor to get the XML text view of your Layout. Android Studio Should look something like this:
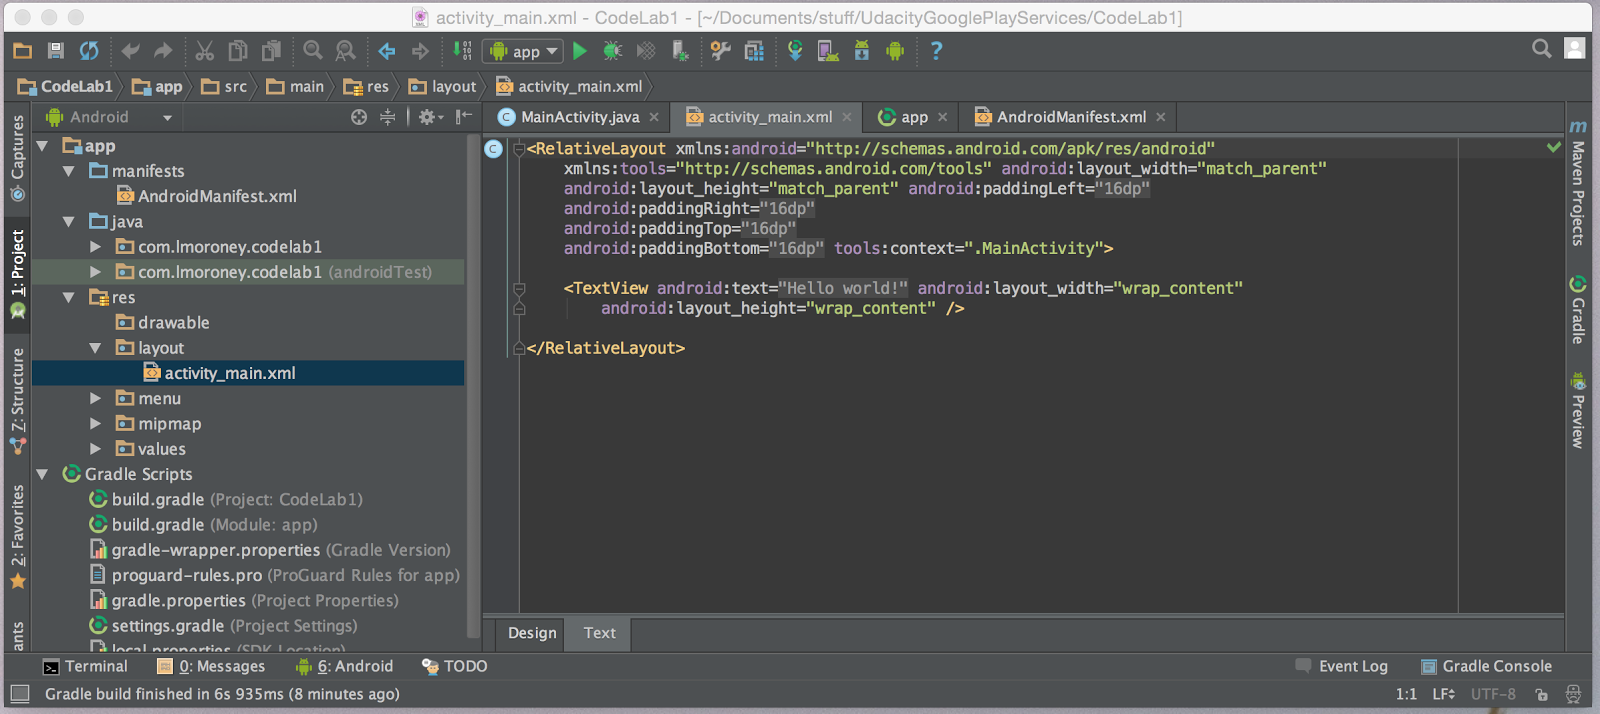
You can see that your layout contains a single <TextView> node. Delete this and replace with:
    <Button
        android:layout_width="wrap_content"
        android:layout_height="wrap_content"
        android:text="Process"
        android:id="@+id/button"
        android:layout_alignParentTop="true"
        android:layout_alignParentStart="true" />
    <ImageView
        android:layout_width="wrap_content"
        android:layout_height="wrap_content"
        android:id="@+id/imgview"/>
This layout gives you a a loading and then processing an image, which will appear in the ImageView.
Edit your AndroidManifest.xml
You should edit your AndroidManifest.xml file at this point with the following line:
<meta-data
     android:name="com.google.android.gms.vision.DEPENDENCIES"
     android:value="face" />
This ensures that the libraries are available for face detection.
Adding face detection to your app
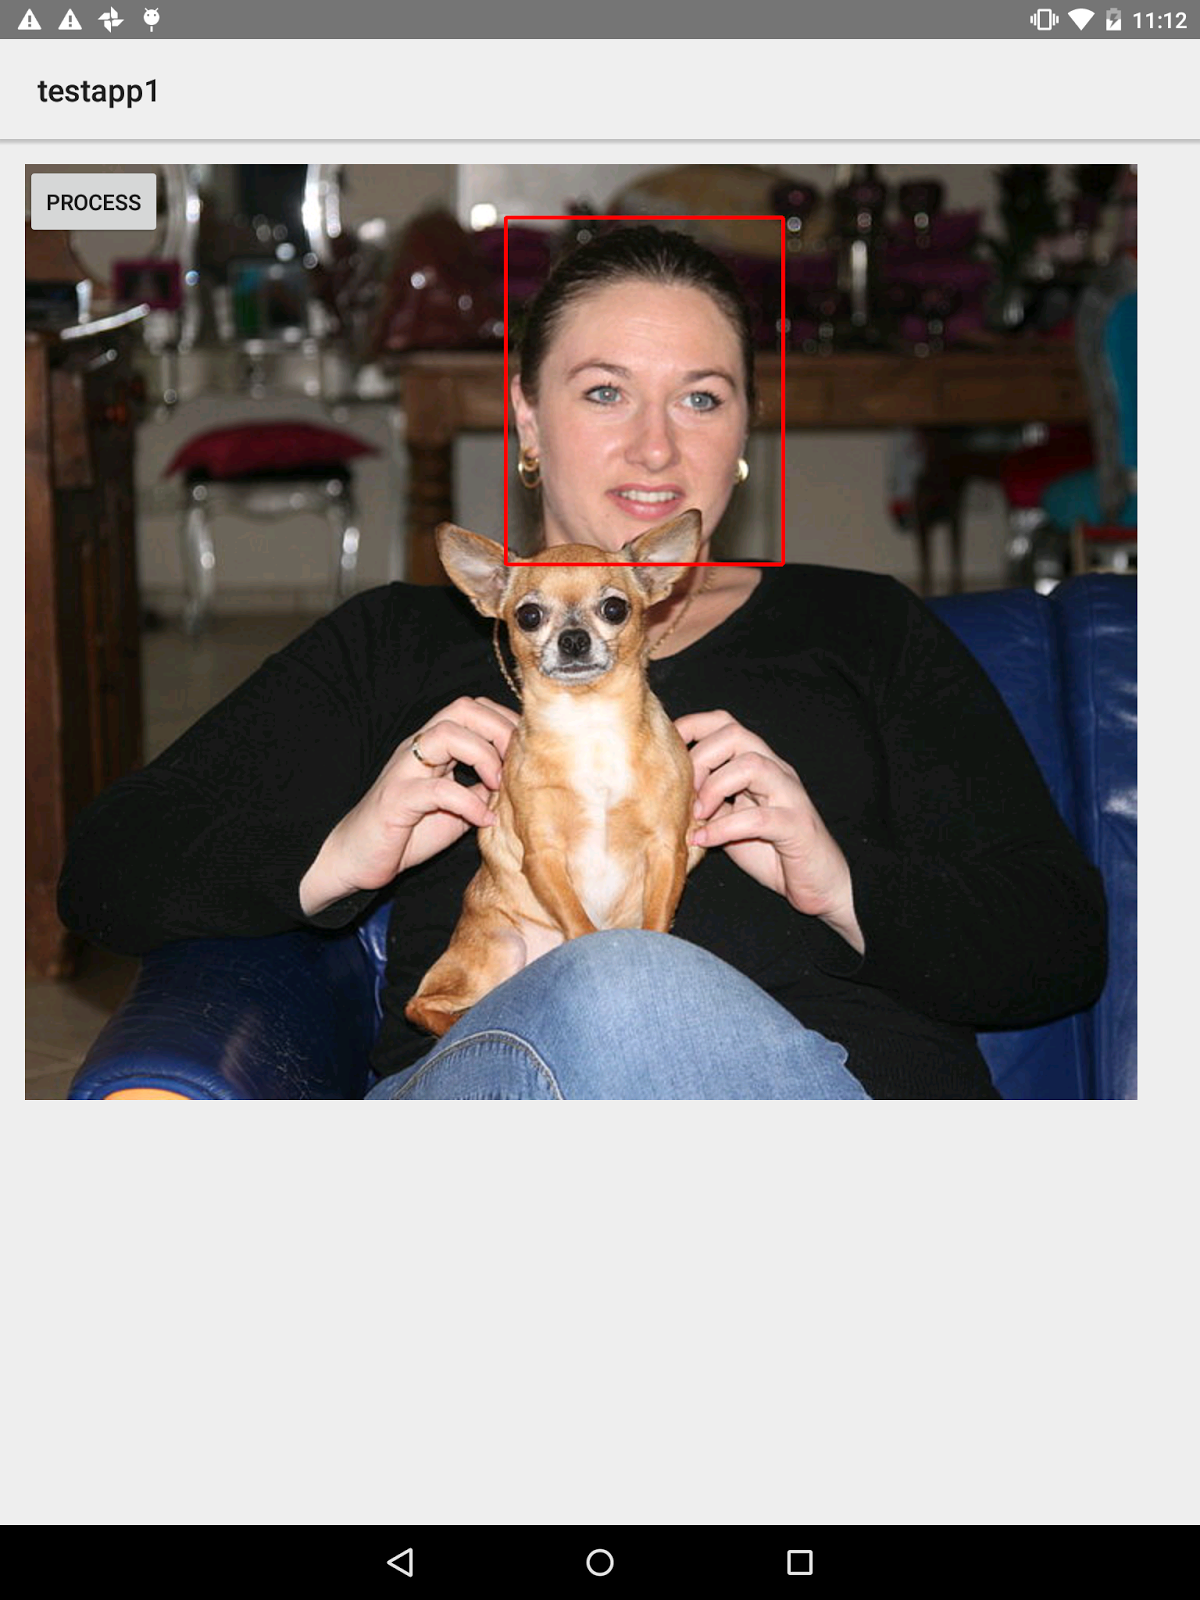
Typically you would take pictures with the device’s camera, or maybe process the camera preview. That takes some coding, and in later steps you’ll see a sample that does this. To keep things simple, for this lab, you’re just going to process an image that is already present in your app.
Here’s the image:

Image - “Woman and a chiwawa dog” by Peter van der Sluijs, available on the CC 3.0 license, downloaded from here
Name it test1.jpg, and add it to the res/drawable directory on your file system. You’ll see that Android Studio adds it to the drawable directory. It also makes the file accessible as a resource, with the following ID: R.drawable.test1
With the image in place, you can now begin coding your application.
When you created the app with a single view activity, the template created a menu on the app. You’re not going to need or use it, so find the code (in MainActivity) that handles these. These are called onCreateOptionsMenu and onOptionsItemSelected. Go ahead and delete these.
This application has a single button that will load the image, detect any faces on it, and draw a red rectangle around them when it does. Let’s write the code to achieve this:
Includes
In case you need them, here’s the full set of includes that this app uses.
import android.app.Activity;
import android.app.AlertDialog;
import android.graphics.Bitmap;
import android.graphics.BitmapFactory;
import android.graphics.Canvas;
import android.graphics.Color;
import android.graphics.Paint;
import android.graphics.RectF;
import android.graphics.drawable.BitmapDrawable;
import android.os.Bundle;
import android.util.SparseArray;
import android.view.View;
import android.widget.Button;
import android.widget.ImageView;
import com.google.android.gms.vision.Frame;
import com.google.android.gms.vision.face.Face;
import com.google.android.gms.vision.face.FaceDetector;
Wiring up the Button
In your MainActivity.java in your onCreate method, add the following code:
Button btn = (Button) findViewById(R.id.button);
btn.setOnClickListener(new View.OnClickListener() {
        @Override
        public void onClick(View v) {
        }
This sets up the event handler (onClick) for when the user presses the button. When they do that, we want to load the image, process it for faces, and draw a red rectangle over any faces it finds.
Load the Image
Let’s start with loading the image. We’re going to be writing on the image (drawing the Red Rectangle over any detected faces), so we need to make sure that the bitmap is mutable. Here are the steps -- first we get a handle on the ImageView control for use later. Then, we use a BitMapFactory to load the bitmap. Note that it’s accessible in the resources using R.drawable.test1. If you used a different name for your image, make sure to replace the test1 with your name. Autocomplete in the editor is your friend here.
ImageView myImageView = (ImageView) findViewById(R.id.imgview);
BitmapFactory.Options options = new BitmapFactory.Options();
options.inMutable=true;
Bitmap myBitmap = BitmapFactory.decodeResource(
        getApplicationContext().getResources(),
        R.drawable.test1,
        options);
Create a Paint object for drawing with
Next, set up the Paint object that you’ll use for drawing on the image. This sets up a stroke width of 5 pixels, and a style of stroke, which means that when it draws a shape, it only draws the outline -- it doesn’t fill the shape.
Paint myRectPaint = new Paint();
myRectPaint.setStrokeWidth(5);
myRectPaint.setColor(Color.RED);
myRectPaint.setStyle(Paint.Style.STROKE);
Create a Canvas object for drawing on
Next, set up the a temp bitmap using the original. From this we can create a new canvas, and draw the bitmap on it.
Bitmap tempBitmap = Bitmap.createBitmap(myBitmap.getWidth(), myBitmap.getHeight(), Bitmap.Config.RGB_565);
Canvas tempCanvas = new Canvas(tempBitmap);
tempCanvas.drawBitmap(myBitmap, 0, 0, null);
Create the Face Detector
We need to create a new FaceDetector object using its builder.
We added the dependency to AndroidManifest.xml so that the libraries would be available before we needed it. But It’s possible that, the first time our face detector runs, Google Play Services won’t be ready to process faces yet. So we need to check if our detector is operational before we use it. If it isn’t, we may have to wait for a download to complete, or let our users know that they need to find an internet connection or clear some space on their device.
FaceDetector faceDetector = new
       FaceDetector.Builder(getApplicationContext()).setTrackingEnabled(false)
.build();
if(!faceDetector.isOperational()){
   new AlertDialog.Builder(v.getContext()).setMessage("Could not set up the face detector!").show();
   return;
}
Note: As this sample is simply detecting a face on a still frame, no tracking is necessary. If you are detecting faces in video, or on a live preview from the camera, you should set trackingEnabled on the faceDetector to ‘true’.
Detect the Faces
Now we’re ready to detect faces. This is really straightforward -- Create a frame using the bitmap,then call the detect method on the FaceDetector, using this frame, to get back a SparseArray of Face objects.
Frame frame = new Frame.Builder().setBitmap(myBitmap).build();
SparseArray<Face> faces = faceDetector.detect(frame);
Draw Rectangles on the Faces
At this point you’ll have a SparseArray of Faces. You can iterate through this array to get the coordinates of the bounding rectangle for the face. The API returns the x,y coordinates of the top left corner, as well as the width and height. Rectangles require x,y of the top left and bottom right corners, so you have to calculate the bottom right using the top left, width and height. Here’s the code.
for(int i=0; i<faces.size(); i++) {
  Face thisFace = faces.valueAt(i);
  float x1 = thisFace.getPosition().x;
  float y1 = thisFace.getPosition().y;
  float x2 = x1 + thisFace.getWidth();
  float y2 = y1 + thisFace.getHeight();
  tempCanvas.drawRoundRect(new RectF(x1, y1, x2, y2), 2, 2, myRectPaint);
}
myImageView.setImageDrawable(new BitmapDrawable(getResources(),tempBitmap));
Now all you have to do is run the app. So, for example, if you use the test1.jpg from earlier, you’ll see that the woman’s face is detected, but not the dog’s.
Similarly, if I use a different image (drop the image in the res/drawable folder, and use it’s resource name instead of R.drawable.test1), and this image has multiple faces, you can see that the API detects them.
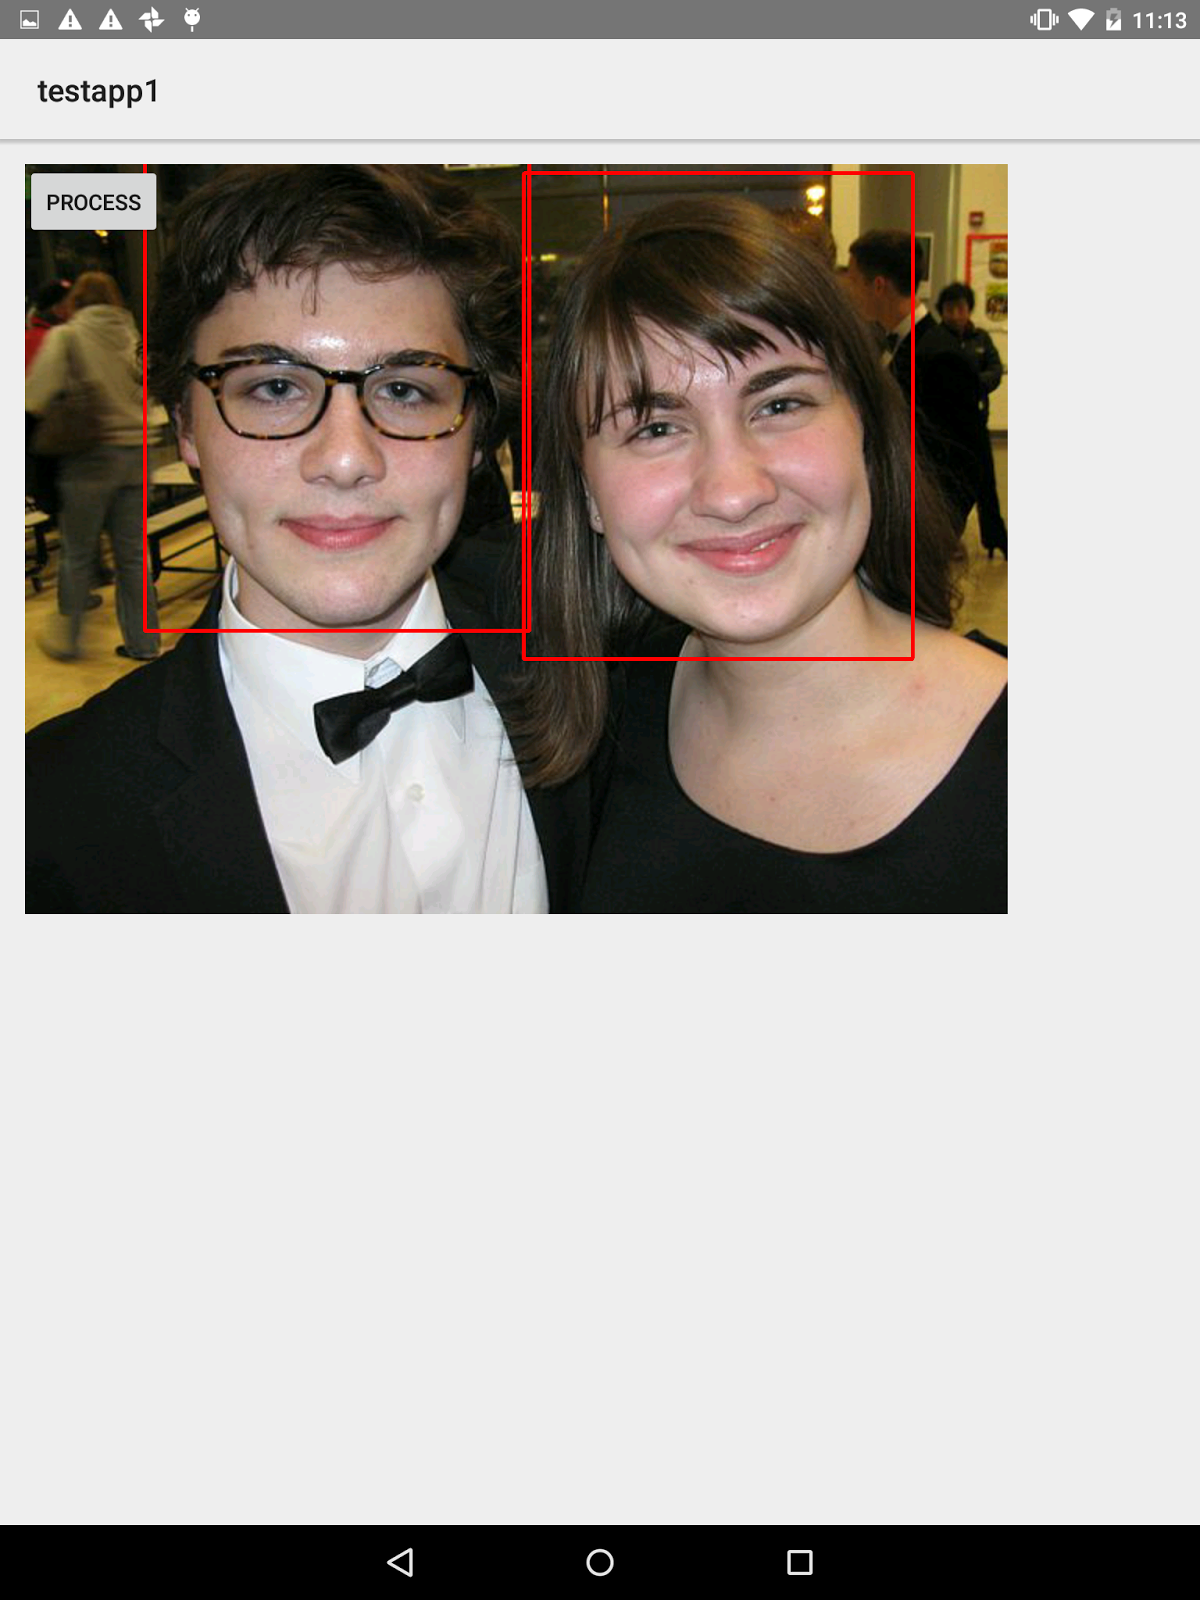
Image sourced from: https://commons.wikimedia.org/wiki/File:Two_people_with_dimples.JPG using CC Share-Alike 3.0 License
In this lab you went end-to-end in creating a simple app that detects human faces in pictures. You did it using a static image, which will give you a start on the principles and how they work. For your next step you can explore the official sample which takes this to the next level, detecting multiple faces and tracking them in the live camera preview.